Have you ever wondered how to make those beautiful handmade super colorful bows that always seem to cost a fortune? They are easier to make than you think. Using May Arts Ribbon, I am going to take you through the process step by step in a series of photos.
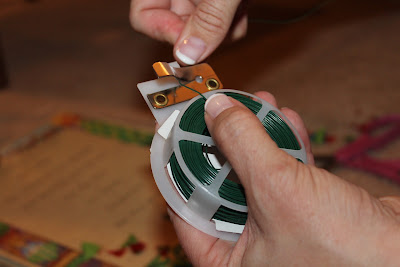
The Supplies you will need are the Ribbons of your choice, a Pair of old scissors, Wire Cutters, Wire, a Wooden Dowel to string your ribbon through, a Large Book and 2 Chairs.
The first thing you will do is string your ribbon on your wooden dowel. The color order does not matter.
I then put my ribbon strung dowel between 2 chairs and scoot them together to hold the ribbon firmly. This will keep you ribbon from rolling everywhere.
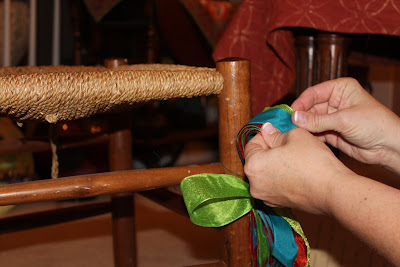
Match up the ends of your ribbon
And put the ribbon ends in the edge of your book to hold it securely.
You will then start wrapping the ribbon around the book making sure to line in up as you go. Take your time.
As you can see my ribbon is lining up. You will keep turning your book and adding more layers of ribbon until you have about 10 full turns on the book. If you are using one color of ribbon, that would be close to 30 full turns which would give you 60 ribbon looks in your finished bow.
When you have enough ribbon loaded onto your book cut the ribbon at an angle and slip it off of the book.
Take the ribbon that was slipped off the book and fold it in half to get a crease mark.
Unfold it and create a small notch on each side. You are wanting to cut out a small triangle from each side of the crease mark.
Be sure to hold your ribbon securely so it does not slip.
Continue and cut a small notch from the other side. DO NOT CUT ALL THE WAY THROUGH THE RIBBON!!!
Cut a length of wire.
Secure the ribbon together using the wire.
Twist the wire around your ribbon firmly to hold everything together.
Attach to wire to something. (I used my chair leg) and start separating and twisting the loops in different directions.
Shape your bow as you see fit. This bow is the size to go on a banister or wreath. For your Christmas Tree, use a larger book and follow the same steps only add more ribbon...probably closer to 15 times around the book or more for a fuller bow.
I hope that you have enjoyed this tutorial. Please leave me a comment. I would love to hear your thoughts!
Now...on to my Christmas Tree!
Here are some of the Handmade Owl Ornaments created for this tree. If you are interested in purchasing your own Owl Ornament be sure to contact me asap and put your name and Owl Ornaments in the Subject Box. I have a limited number of signed owls to sell.
Be sure to head on over to the May Arts Blog and check out some more amazing Christmas Tree Ribbon ideas!
Happy Scrappin'


Great colours!!
ReplyDeleteLovely bow !MY daughter would LOVE your tree. She LOVES LOVES LVOES owls.
ReplyDeletewhat a grand tutorial. thank you
ReplyDeleteGorgeous bow and the owls are adorable!
ReplyDeleteYou know I love it! I love everything you do! Well done Kendra, thanks for sharing this tutorial with us! XXOO
ReplyDeleteI'm never successful in making a great bow so your tutorial is much appreciated. Gorgeous tree, great bow topper, just really beautiful.
ReplyDeleteWhat a good idea. I like how you made the bow so successfully.
ReplyDeleteGreat tutorial. You made it very easy to do. Thank you.
ReplyDeleteLove this idea!!!!!
ReplyDeleteWow, love all these bright colored ribbons together.
ReplyDeleteBeautiful combo of ribbons to make your stunning tree-topper!
ReplyDeleteGorgeous!
ReplyDeletebeautiful
ReplyDelete