Hello! It's Kendra here again with the Designers Craft Blog Connection and we are hopping with
Be sure to get inspired over the weekend by our group of talented designers and their use of ImpressArt Metal Stamps.
We have an awesome give away coming up!
The Grand Prize is valued at up to $120.00 and contains:
1- ImpressArt alphabet set of the winner's choice
- ImpressArt Steel Stamping Block, small
1- ImpressArt Metal Stamping Hammer
1- ImpressArt Stamp Straight Tape
An Assortment of metal discs
To enter the contest head on over to the ImpressArt Facebook page and follow the instructions! Good Luck!
I was so excited to arrive home a few weeks ago to find a little box full of all kinds of goodies! I couldn't wait to get started!
I was sent the following:
the ImpressArt Alphabet Stamp Set, Bridgette lowercase
various ImpressArt Design Stamps
ImpressArt Metal Stamping Blanks
an ImpressArt Metal Stamping Hammer
an ImpressArt Steel Stamping Block
and the ImpressArt Stamp Straight Tape.
I couldn't wait to get started! Now you can easily make jewlery and so much more with just the swing of a hammer!
I first thing I decided to make was a star powered keychain with my 2 youngest children. This could also be used to make a super cute necklace or ornament.
I used the ImpressArt Funky Star, 1 1/4" Metal Blanks and the Fun Star ImpressArt Design Stamp and once again did an all over design and punched a hole using the ImpressArt 2 Hole Punch. Using pliers, link together several star shaped jump ring and attach your completed star to the top of the key ring.
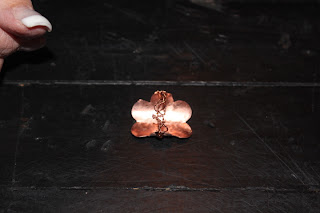
The next project I did was a Copper Ring.
Here it is finished
6 Petal Flower, 1 3/8" ImpressArt Metal Blank impressed with the Whimsy Flower ImpressArt Design Stamp
Here is the flower once it has been impressed.
Punch 2 holes and apply a piece of rolled painters tape to the back of the flower.
Using a wooden dowel or in my case a spline tool, press the flower to the wood.
(I couldn't find a dowel the size I needed.)
Using a Ziptie, firmly attach the flower very tightly.
You will have to tighten it several time while hammering.
With this ring, I had to step down to an old steel broom handle the get the size I was looking for.
Here is the flower once it had been pounded along with the copper wire for the back of the ring.
Loop the wire through and start twisting. Twist, twist and twist some more!
Loop the twisted wire through the other hole and keep kinking and twisting the wires.
Here is the finished back. I used the Beadalon Nylon pliers to flatten the wires to they are smooth.
With the excess wire make a coil and flatten it with the Beadalon Nylon Pliers.
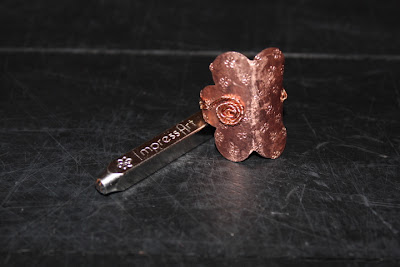
Here is the other side.
The finished product with the ImpressArt Design Stamp.
I love how the ring turned out and it is amazingly comfortable!
The last and final project was a Pinky Ring.
It was created with a thicker gauge wire that I hammered out flat. Once it was flat, I used the astrick from the ImpressArt Bridgette-Lowercase Stamp Set and the ImpressArt Whimsy Heart Design Stamp alternating them in a pattern. I then wrapped my metal around a thick marker to create its shape and cut the excess off creating a super quick and easy pinky ring.
I hope you have enjoyed my projects. Be sure to head on to the next blog to check out what they have made. :-)
Happy Scrappin'


Wow! You have some amazing ideas here! Using a zip tie to flatten out metal, hammering thick gauge wire to make a ring... you are full of surprises!
ReplyDeletewww.mel-designs.typepad.com
This is great! Love how you created these, and what a neat tool this is!
ReplyDeleteKendra, What a great idea! I would have never thought of making rings. Very creative!!!
ReplyDeleteYou had a lot of great ideas, Kendra. I'm impressed (no pun intended) that you created such a variety of projects. I thought you showed an innovative way to bend the metal charm using ordinary materials. Thanks for participating in the hop!
ReplyDeleteThe star keychains are awesome! Very cute design. Love-love both rings, great projects!
ReplyDelete-Molly
Clever, clever, clever ideas!
ReplyDeleteGreat project!
ReplyDeleteVery Cool Projects!!!
ReplyDeleteGreat projects!
ReplyDeleteThank you, thank you, thank you for this adorable project template! I can't wait to make it.
ReplyDeleteThose look like fun. Great job. Keep it up.
ReplyDeleteI love these rings! I think based on your photos - I am needing more toys (tools)! lol! kg
ReplyDeleteTFS these great projects! I have been looking for a how-to for an artistic ring to make for myself. I just love your cricut projects too...I will be subscribing via email :)
ReplyDelete