Live Video

Thursday, February 7, 2013

May Arts Ribbonista Valentine's Blog Hop!


It's Kendra here with an exciting May Arts Valentine's Blog Hop!  If you have been hopping since the beginning you should have arrived from Encore Creations.  We are on the 5th day of inspiration.


I created a recipe card for my valentines project.  It is Sweetheart Fudge Pie and let me tell you, it is so yummy!

I created it with the Silhouette Cameo and had so much fun.  I wanted to create a piece of paper that I could weave my May Arts Ribbon through.

I used the May Arts Ribbon in style EA-01 1/2 inch solid wrinkled.


I really like how it turned out.


I am making my 8x8 ribbon woven paper file available for you.
All you have to do is click here.

If you want to create your own version of my Sweetheart Fudge Pie recipe, I have also attached the recipe here!

Be sure to comment and tell me your favorite recipe and what your favorite May Arts Ribbon is.

Your next stop on the Blog Hop is Just Jingle

Now be sure to leave a comment at all the Ribbonista stops for a chance to win four spools of May Arts Ribbon!

If you missed any of our days go ahead and start from the beginning.  Here is a complete list!

Valentine Hop Schedule

Monday

Tuesday

Wednesday
Jen Shears

Thursday

Friday


Happy Scrappin'


Monday, January 7, 2013

Angel Wings For Charity Wings Live CHA Event

It's Kendra here again and have I been busy!  I have been working on a set of Angel Wings for Elena to wear during CHA for Charity Wings live CHA Sneak Peek Event.  If you have never participated with this event before be sure to this year!  You can also purchase raffle ticket to be entered to win TONS of AWESOME prizes from some of your favorite manufactures!  You can even get sneak peeks of what some of the prizes will be.  I will be interviewed on Monday by Elena.  :-)

Here is my sneak eek of the outfit that my friend Stephanie and I have been working on.
She made the dress and I made made the wings.  Be sure to let me know in the comments what you think of them!


Let me know if you are going to participate in the Charity Wings Live Event!

Happy Scrappin'


Tuesday, December 18, 2012

May Arts Ribbonista Christmas Blog Hop!

It's Kendra here again with a May Arts Christmas Blog Hop

You should have arrived here from The Bald Dragonfly 
 Everyone projects are so amazing!  Be sure to hop through the entire hop and don't miss out on any of the days...these is much more to come on Wednesday, Thursday and Friday!
My project today is perfect for your own home or as a gift for a friends home.

You will need a few items:
May Arts Ribbon in the following colors:
Glass Block that has been predrilled
a Small set of Christmas Lights
Wire
Scissors
Wire Cutter

The first thing you are going to do it cut 2 lengths of ribbon to tie around your glass block.  I hid the first one at the bottom and the second one in the back, you could hid the tied part behind the first ribbon if you desire.


You will then push your lights carefully though your Glass Block Hole where it is predrilled.


Now you will make your bow and attach it to your ribbon on the top of your glass block.  I made a tutorial earlier this week showing how to make your bow.  You will find it here.  I use the wires to wrap around the ribbon to secure it well.


Plug your glass block light in and decide is this one is for you or a friend.  They are easy to store from year to year.

Be sure to leave me a comment on how you liked this project.  If you are not already a subscriber, take a moment to become one.  I love to share ideas and projects with you!

You are now going to hop on to Ling's Design Studio
If you missed yesterday be sure to check out the following blogs.
   
Merry Christmas and Happy Scrappin' from my family to yours!


Friday, December 7, 2012

How To Make A Super Simple Colorful May Arts Ribbon Holiday Bow!

Have you ever wondered how to make those beautiful handmade super colorful bows that always seem to cost a fortune?  They are easier to make than you think.  Using May Arts Ribbon, I am going to take you through the process step by step in a series of photos.

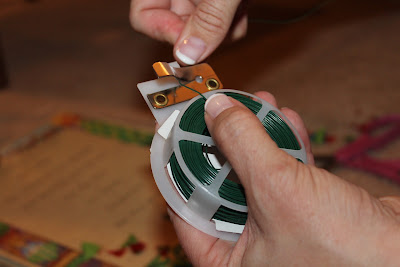
The Supplies you will need are the Ribbons of your choice, a Pair of old scissors, Wire Cutters, Wire, a Wooden Dowel to string your ribbon through, a Large Book and 2 Chairs.

The first thing you will do is string your ribbon on your wooden dowel.  The color order does not matter.

I then put my ribbon strung dowel between 2 chairs and scoot them together to hold the ribbon firmly.  This will keep you ribbon from rolling everywhere.

Match up the ends of your ribbon

And put the ribbon ends in the edge of your book to hold it securely.

You will then start wrapping the ribbon around the book making sure to line in up as you go.  Take your time.

As you can see my ribbon is lining up.  You will keep turning your book and adding more layers of ribbon until you have about 10 full turns on the book.  If you are using one color of ribbon, that would be close to 30 full turns which would give you 60 ribbon looks in your finished bow.

When you have enough ribbon loaded onto your book cut the ribbon at an angle and slip it off of the book.

Take the ribbon that was slipped off the book and fold it in half to get a crease mark.

Unfold it and create a small notch on each side.  You are wanting to cut out a small triangle from each side of the crease mark.

Be sure to hold your ribbon securely so it does not slip.
  
Continue and cut a small notch from the other side.  DO NOT CUT ALL THE WAY THROUGH THE RIBBON!!!

 
Cut a length of wire.

Secure the ribbon together using the wire.

Twist the wire around your ribbon firmly to hold everything together.

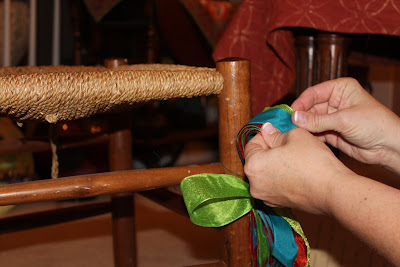
Attach to wire to something. (I used my chair leg) and start separating and twisting the loops in different directions.

Shape your bow as you see fit.  This bow is the size to go on a banister or wreath.  For your Christmas Tree, use a larger book and follow the same steps only add more ribbon...probably closer to 15 times around the book or more for a fuller bow.

I hope that you have enjoyed this tutorial.  Please leave me a comment.  I would love to hear your thoughts!

Now...on to my Christmas Tree!


Here are some of the Handmade Owl Ornaments created for this tree.  If you are interested in purchasing your own Owl Ornament be sure to contact me asap and put your name and Owl Ornaments in the Subject Box.  I have a limited number of signed owls to sell.  


 Be sure to head on over to the May Arts Blog and check out some more amazing Christmas Tree Ribbon ideas!

Happy Scrappin'


Monday, November 19, 2012

May Art and Helmar Blog Hop! Dear Santa Layout with .cut file Included!

Welcome to the May Arts and Helmar Blog Hop!  I hope you have enjoyed hopping along and seeing all the neat ideas and projects everyone has been showing.  Aren't they great!  If you are participating in the Blog Hop, you should be arriving here from The Mermaid's Closet with Martha Richardson.  If you are just joining us here is a complete list of the blogs to hop...

Day 1 – November 19th
Day 2 – November 20th


It is almost that time of year again and I have brought you a fun and festive Christmas Layout...Dear Santa

Dear Santa was created using the 1.25" Silk May Arts Ribbon, Helmar Quickdry Adhesive, The Cricut Expression, The Cricut Design Studio, Plantin Schoolbook Cricut Cartridge, All Mixed Up Cricut Cartridge and Christmas Cricut Cartridge.  I also used Green, Red, Gold, Shiny Gold, White and Peach Cardstocks as well as a Black and a White Signo Gel Pen and a Westcott Knife.  


Santa's cheeks were airbrushed on using the Copic Airbrush System and a pink marker.  I will warn you, this takes some practice so be sure to start of scrap paper or use chalk to achieve rosy cheeks.
As a special gift to everyone, I am attaching the DearSanta.cut file for your cutting enjoyment!  You will create the layout according to my .cut file in the Cricut Design Studio.
This file can also be transferred into your Cricut Gypsy.  


Once your layout is completely assembled, use your craft knife to cut 2 small slits on either side of the letter t in Santa and run the 1.25" White Silk Ribbon through it and tie into a beautiful bow.  Trim the ends of the bow and viola...You have an adorable Dear Santa layout just waiting for your little one's photo.


It would be so cute with a picture of your little one holding up there letter to Santa.

Thanks for hopping by...I would love to know that you were here.  Please leave me a comment so you are elegible to win one of the great prizes listed below and then be sure to head on over to
Where Chaos Meets Creativity and see what Lisa Wilkinson has in store for you.  :-)

Art-Craft-Group-shot_sml

Helmar will be offering two Arts & Crafts Starter packs!
***Please note that picture above is a graphically representation.  Actual products provided are listed on Helmar’s store websites***

SAMSUNG DIGITAL CAMERA
May Arts will be offering two prize packages of winner’s choice of 2 spools of ribbon!
So, how do you enter to win a chance at one of these grand prizes?   Hop through with us and visit each designer’s blog and leave a comment on their Helmar and May Arts Blog Hop post.   The first winners will be chosen on the 21st and the second winners will be chosen after the Thanksgiving Holiday weekend!

Happy Scrappin'